
Create a guest list and invite guests
How to invite one guest or a whole CSV list, track the sending and invite more guests later.
With a guest list you hand out tickets without anyone paying: for press, partners or guests of honor. The guest gets an invitation by email and claims their tickets through it.
Invite one guest
Create a guest list
In the sidebar, click Guest lists under Sale, then Create guest list.
Choose the event and tickets
Choose the Event. Then choose a Ticket type and the Quantity, for example 2 if the guest may bring a companion. With Add you hand out more ticket types.
Set details and deadline
Under Guest details you decide what the guest fills in when claiming, for example Ask for address. Under Expires on you set the deadline: the guest can claim their tickets up to and including this day.
Enter the guest
Under Invitation, keep the Single invite tab open and enter the E-mail, and the Mobile number if you like.
Send the invitation
Keep Notify guest on. Choose the Language and adjust Subject and text if you want. Click Create. The guest gets their invitation by email.
Invite many guests by CSV
Choose Mass invite
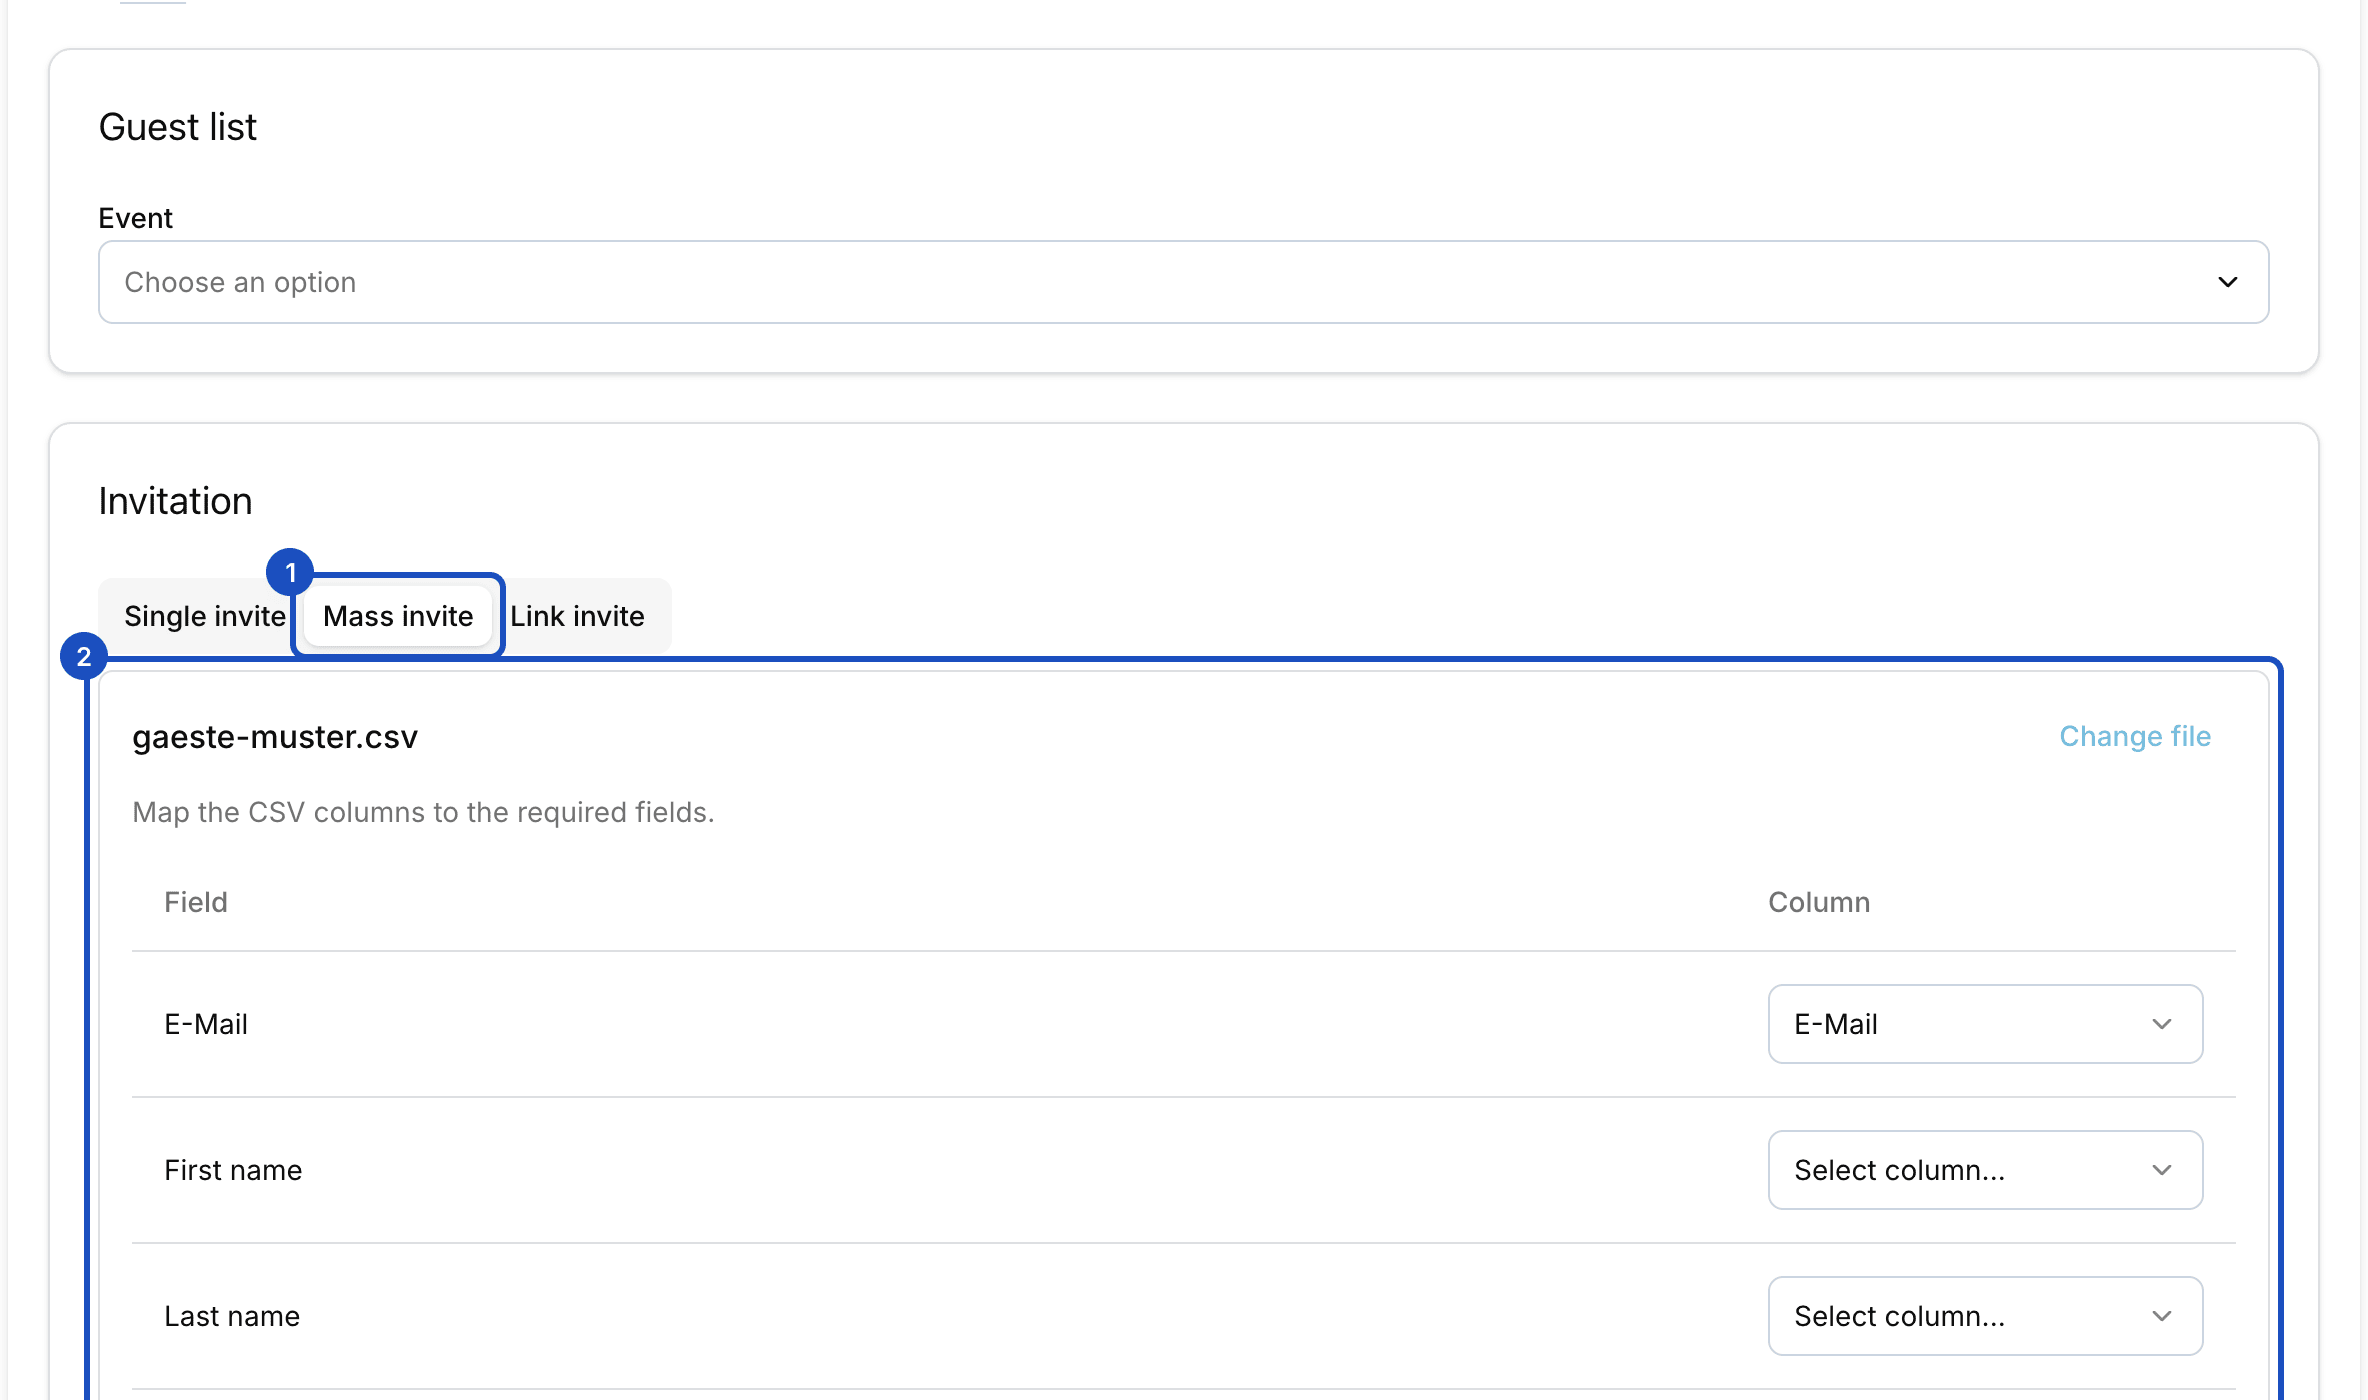
Fill in event, tickets and deadline as above. Under Invitation, switch to the Mass invite tab.
Upload the CSV
Upload your CSV file and map the columns: E-Mail, plus First name and Last name or a Full name. Up to 1,500 guests fit in one file.
Every guest in the file gets the same tickets and the same deadline. Create
Click Create. Eventbuddy creates a separate guest list for every guest and sends the invitations one after another.
Track the sending
All guests of a mass invite form a Batch. You find it under Guest lists in the Batches tab. The batch page shows how many invitations were delivered, opened and activated, and lets you filter the guests, for example Opened, not activated.
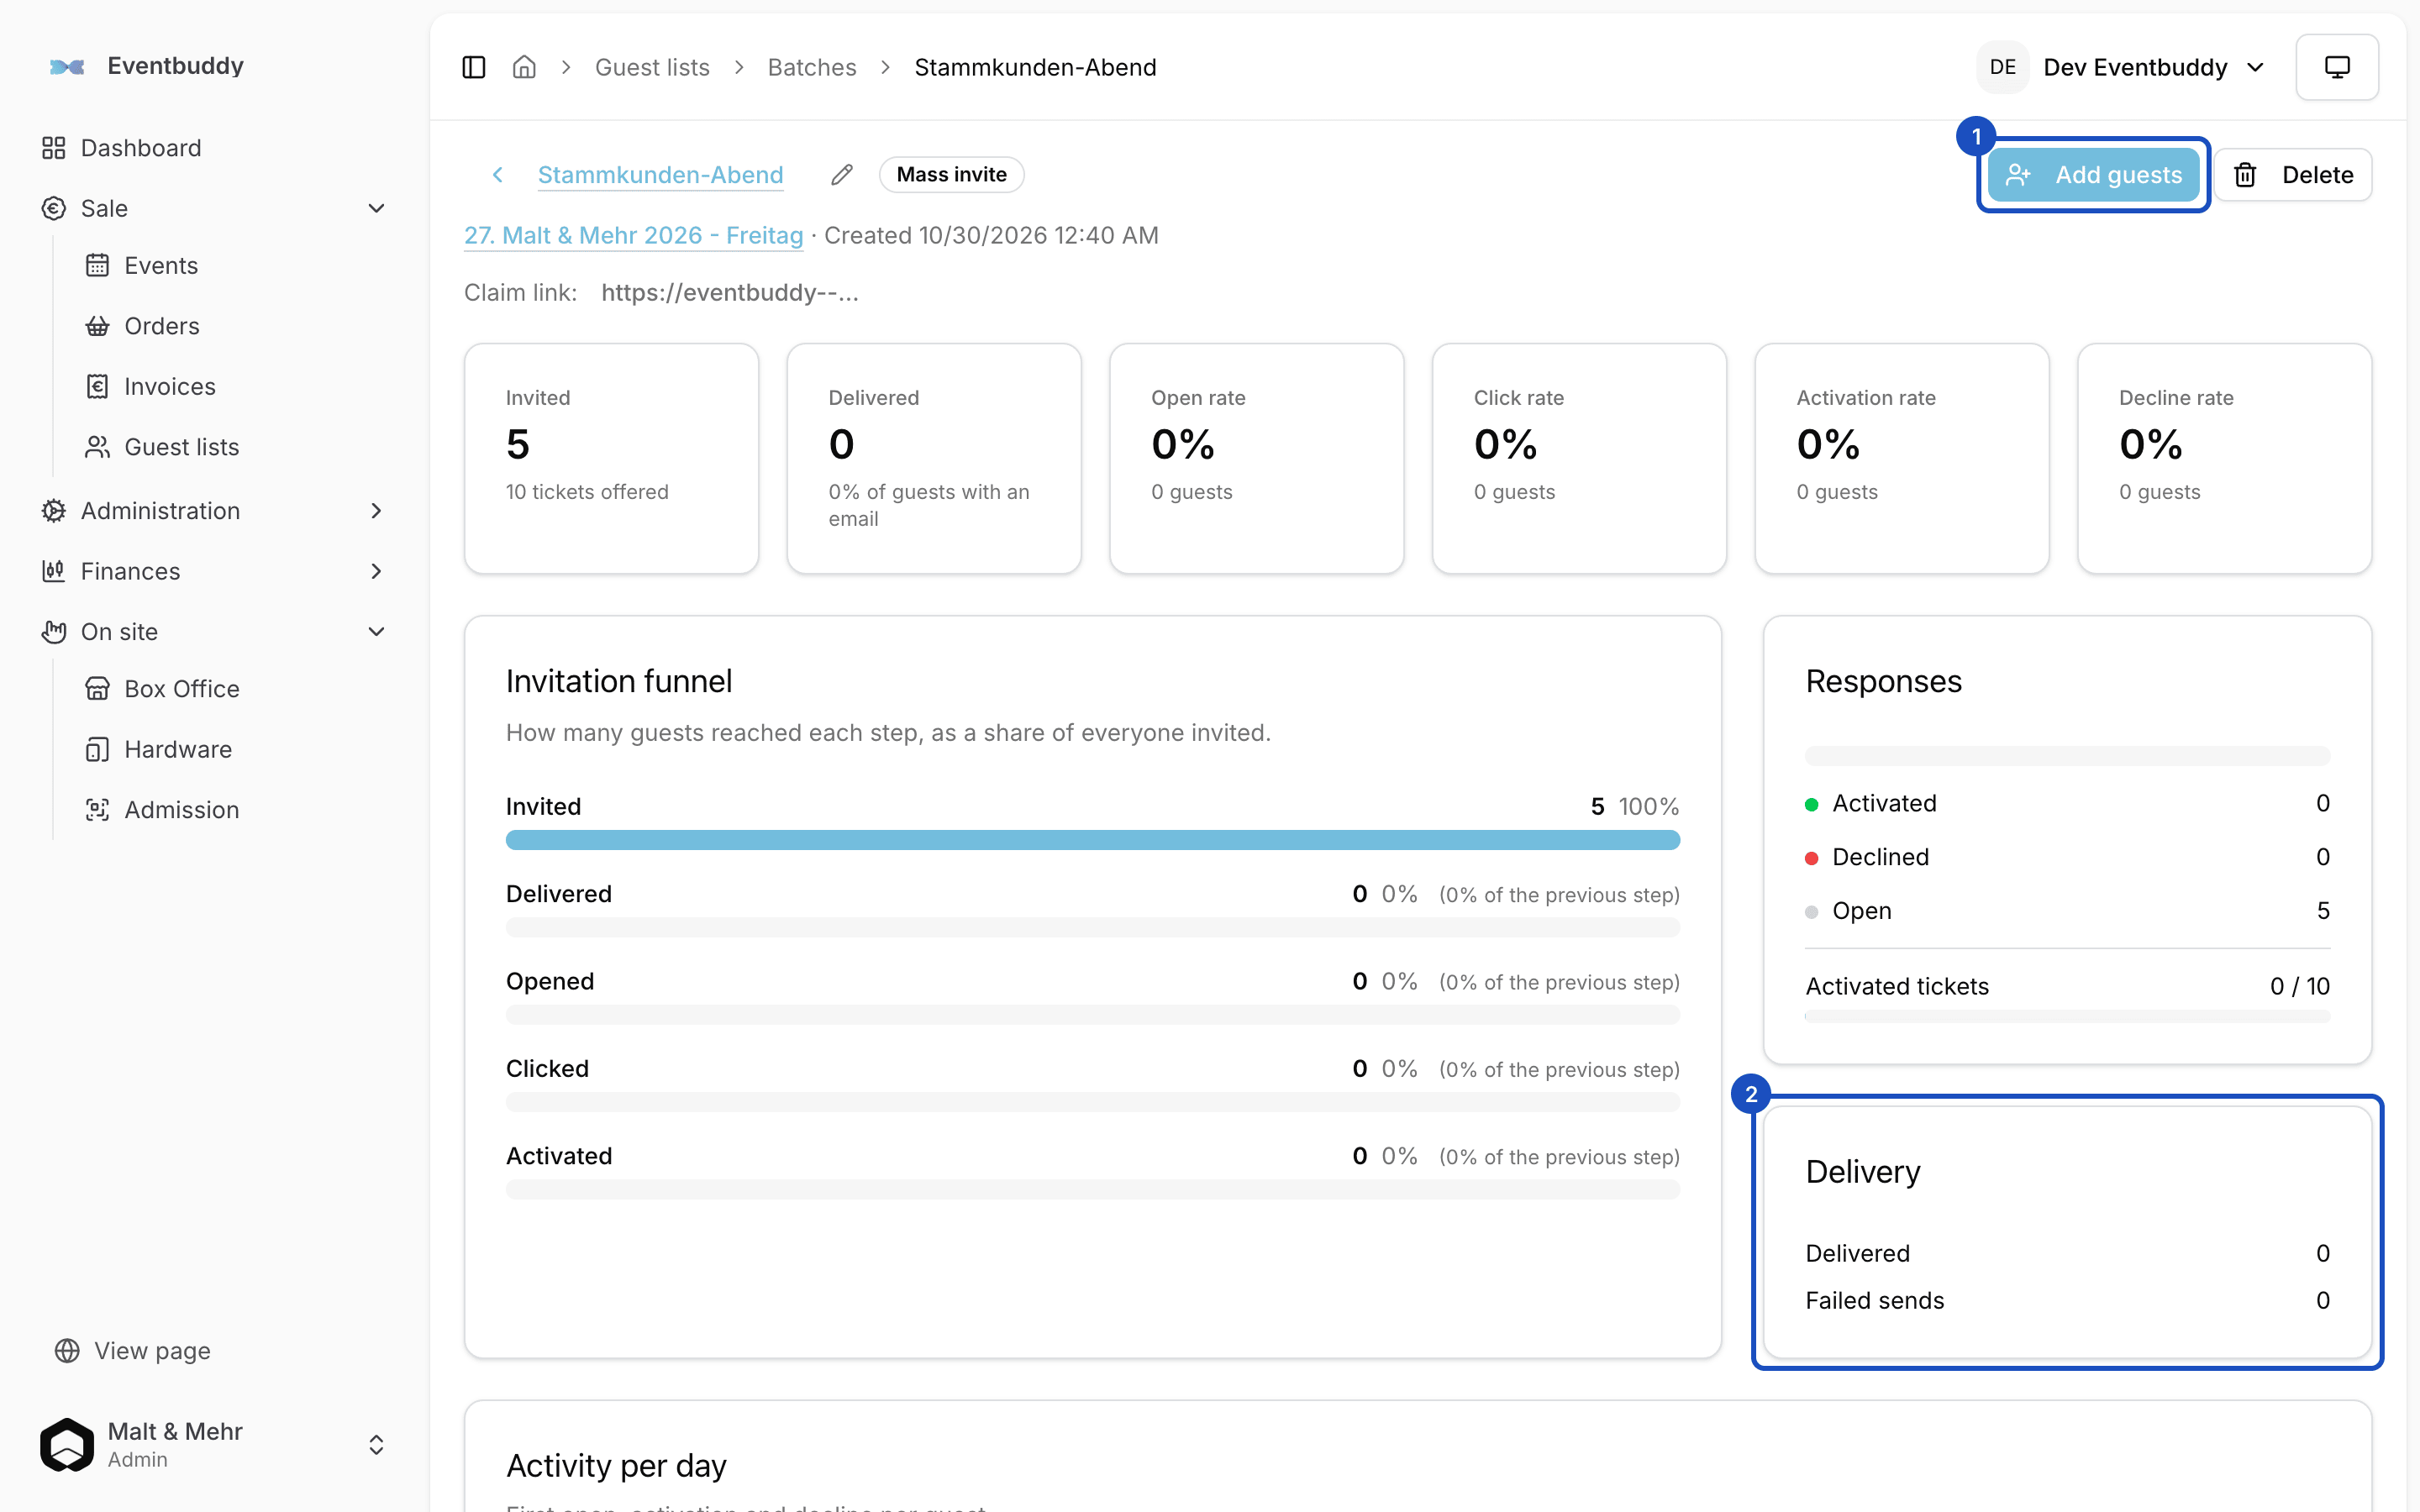
- Resend: if the Delivery section shows a number at Failed sends, this button sends those invitations again.
- Add guests: invites more guests, one at a time or as a CSV list. They get the same tickets and the same invitation. Anyone already in the batch is skipped.
- Cancel sending: stops invitations that are still queued. Emails that were already sent stay sent.
Good to know
How do I see who has already accepted?
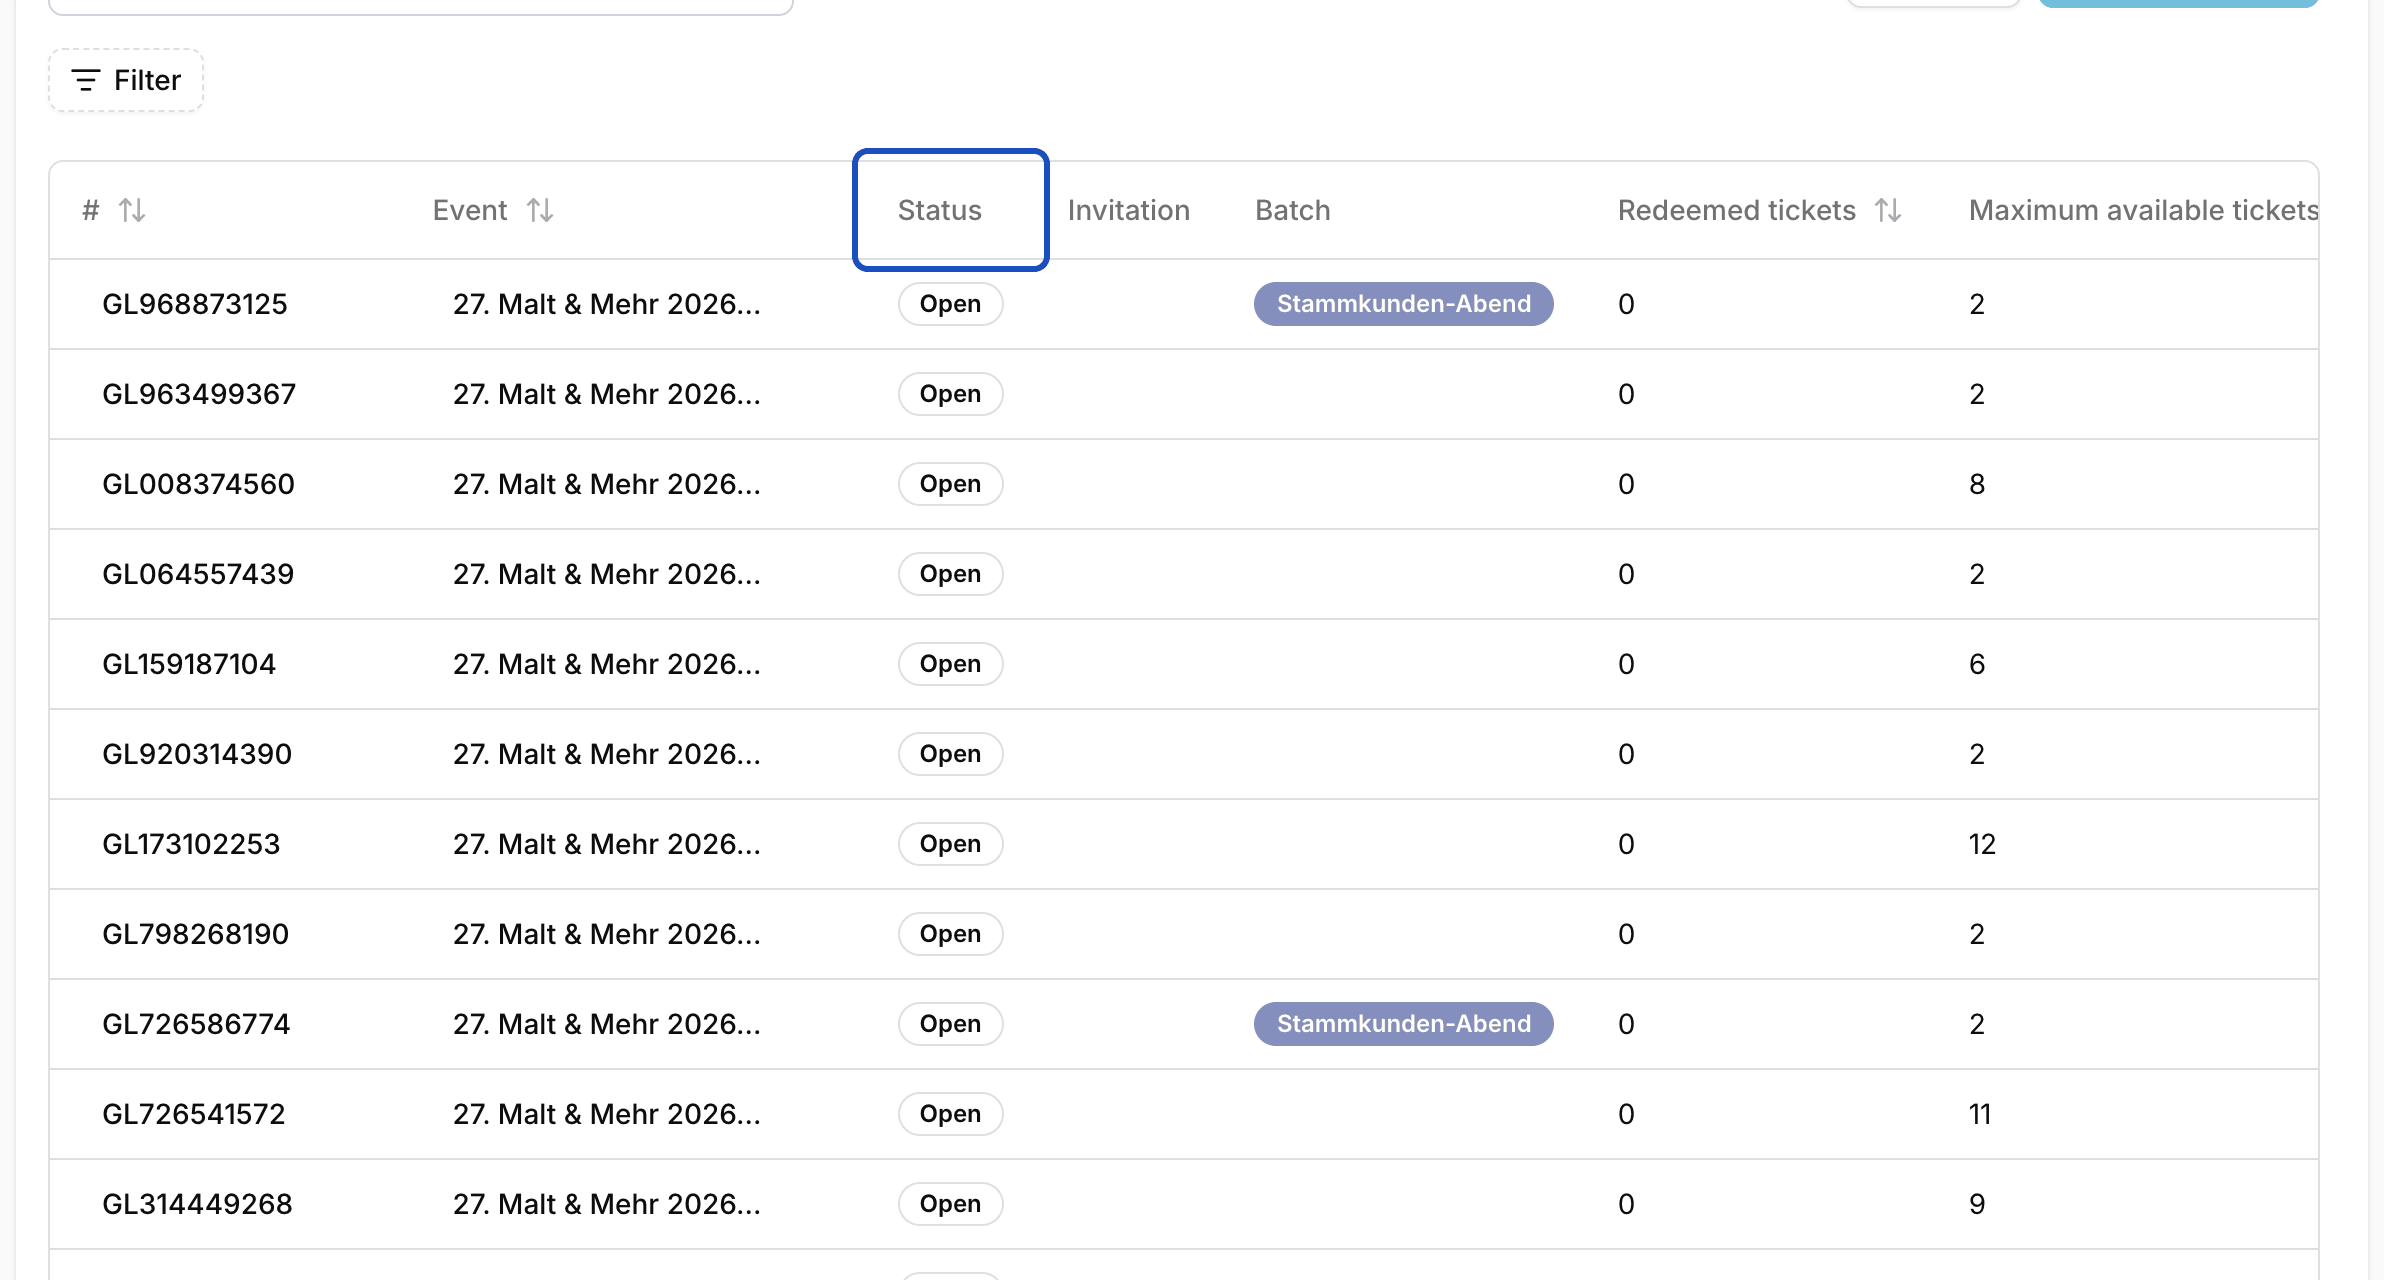
In the list under Guest lists, the Status column shows whether an invitation is Open, Partially activated, Activated, Expired or Declined.
A guest did not get the email. What now?
Open the menu of their guest list in the list and click Resend email. Check first that the address is correct.
Are guests scanned the same way as buyers?
Yes. Every guest has their own ticket with a QR code. If needed, the scanner takes you straight to the guest list.