
Set up ticket types
How to set a ticket's price, contingent and sales period, sell a table as one ticket and sort tickets into categories.
An event can have several ticket types, for example early bird, regular and reduced. For each ticket type, you set price, quantity and sales period. Everything happens in the event's Tickets section.
Before you start
You need an event. Create your first event shows how to create one.
Set up a ticket type
Add a ticket
Open the event for editing and, in the Tickets section, click Add ticket.
Name, price and quantity
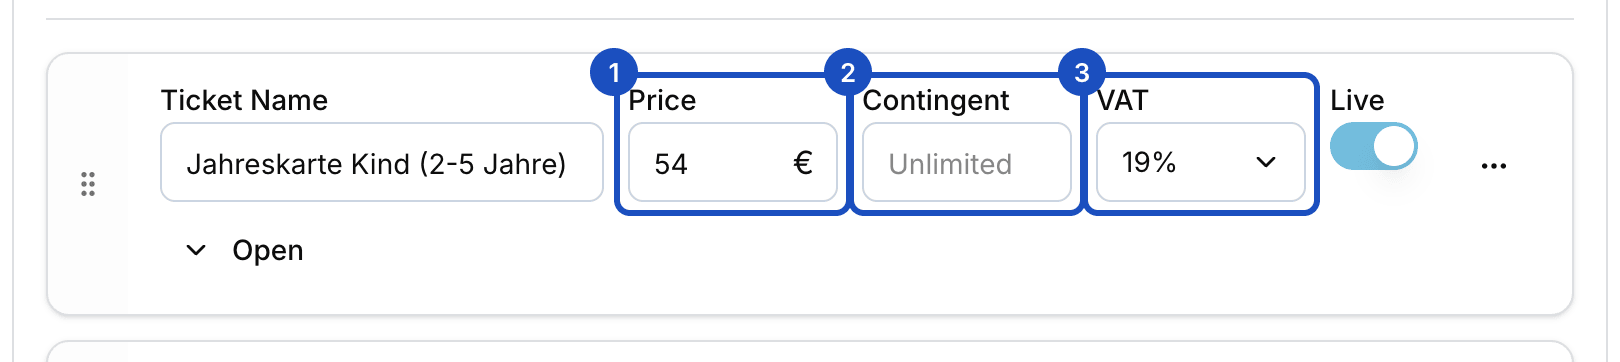
Enter Ticket Name, Price and VAT. Under Contingent, set how many tickets of this type there are. Empty means unlimited. Live makes the ticket type visible in the shop.
Open the further settings
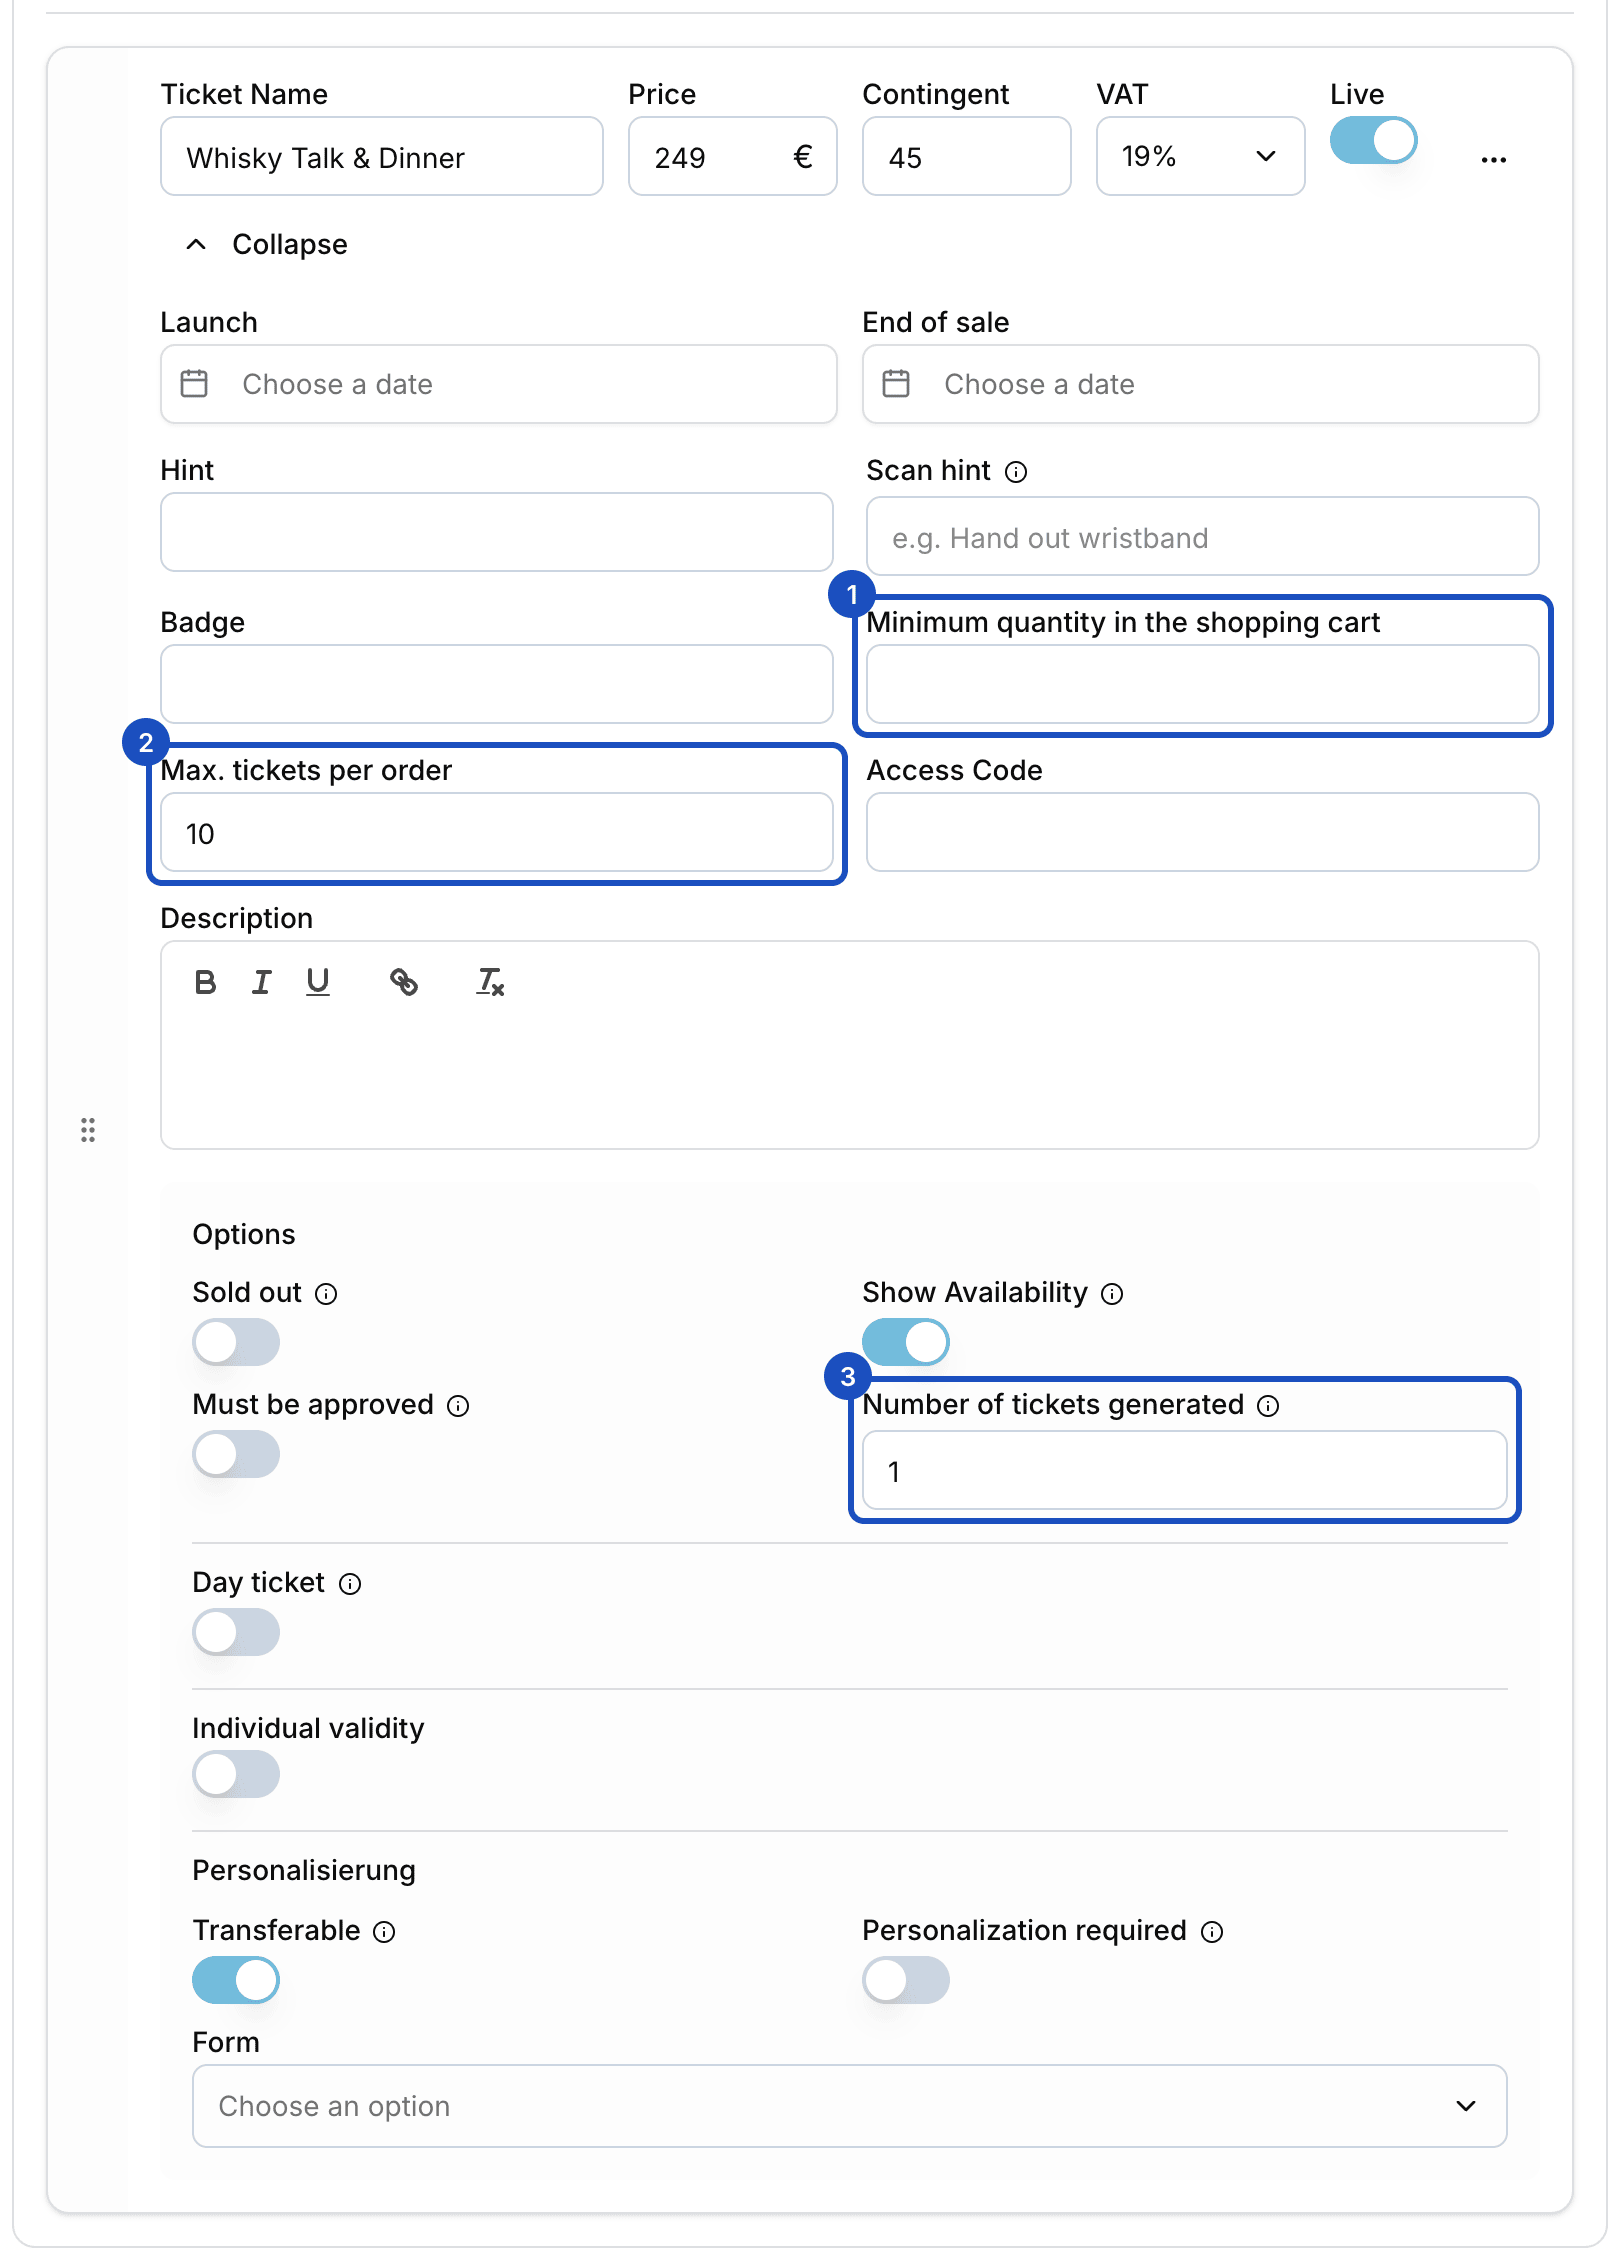
Click Open. Here you set Launch and End of sale. Before and after, the ticket type can't be booked.
Limit quantities per order
With Minimum quantity in the shopping cart and Max. tickets per order, you set how many tickets of this type an order contains at least and at most.
Save
Click Save at the bottom. Ticket types are saved together with the event.
A table for ten as one ticket
If you sell tables or groups, enter 10, for example, under Options in Number of tickets generated. Whoever books a table gets ten tickets. Against the ticket type's Contingent, the table counts as one. Against the event's Maximum capacity, all ten tickets count.
Sort tickets into categories
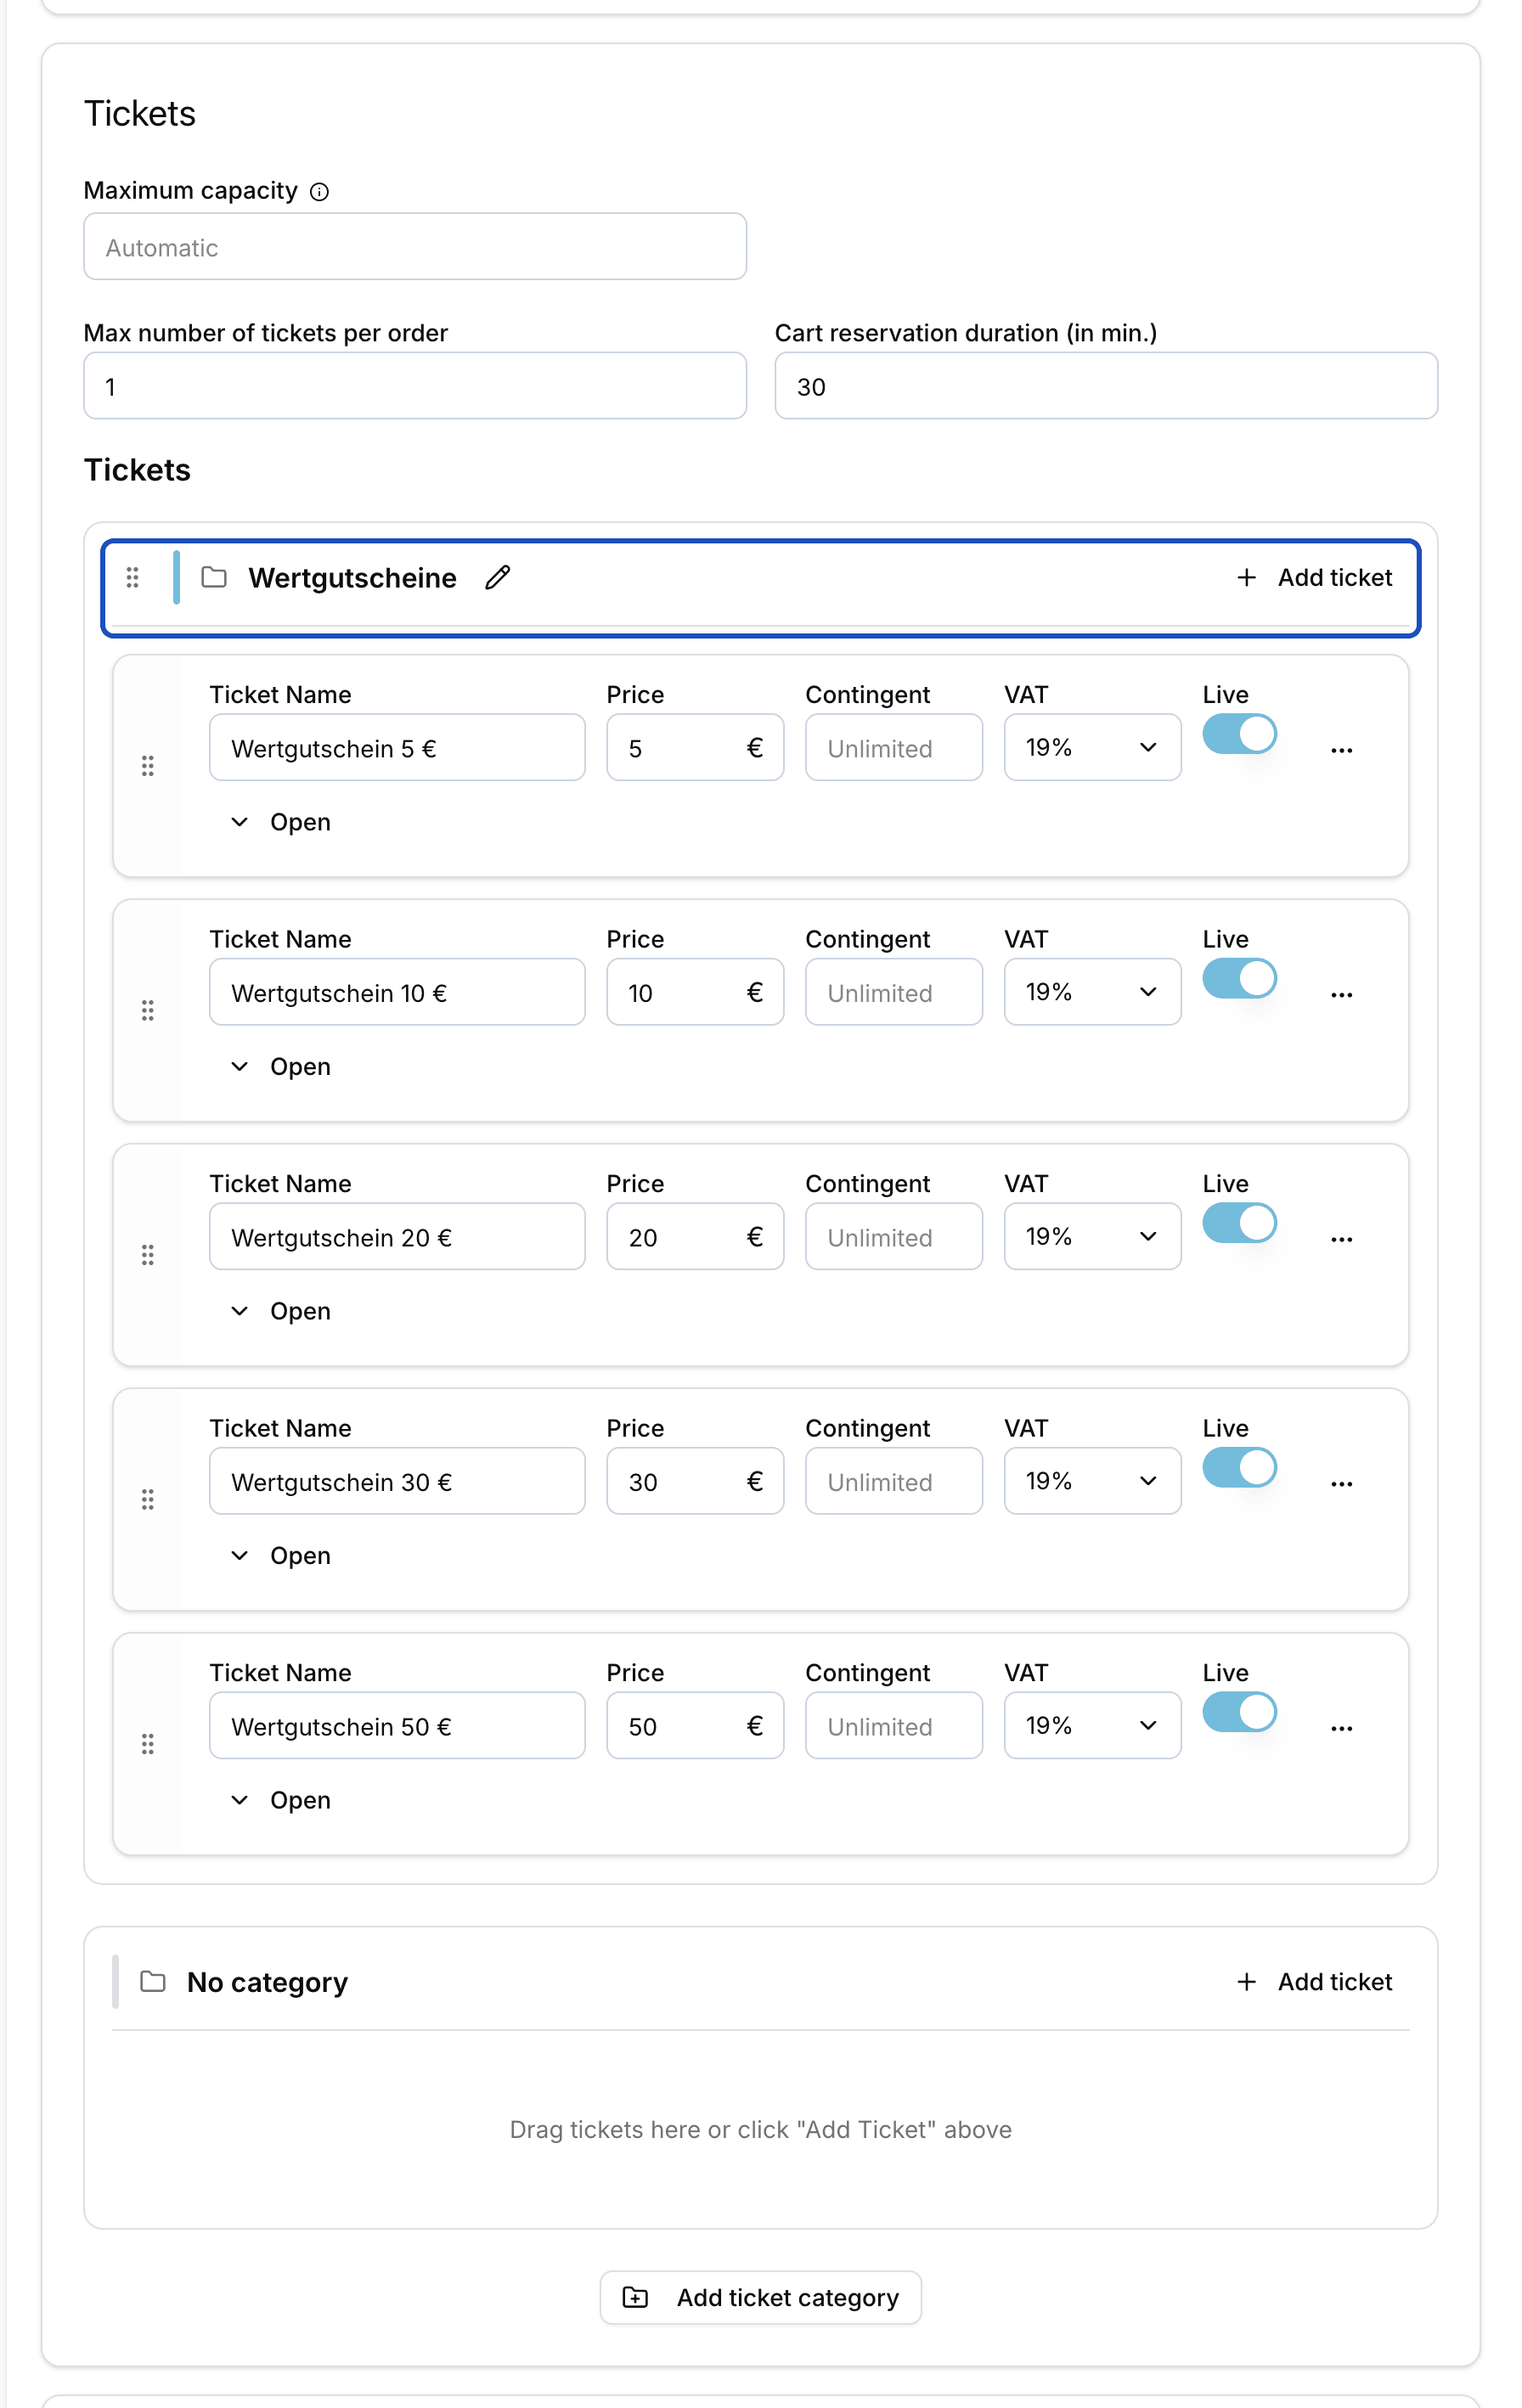
With many ticket types, some structure helps, for example "Day tickets" and "Annual passes". Below the tickets, click Add ticket category and then Create, or pick a category from Existing categories. A category has a Name, a Color and a Description. Drag tickets into the category by the handle on the left, and drag categories into the right order by the handle next to their name. In the shop, the tickets then appear under these headings.
Good to know
How does each ticket get a name?
Under Options, switch on Personalization required. At checkout, a name must then be entered for each ticket. With Transferable, the name can still be changed after the purchase, for example when someone passes their ticket on.
Can I show a ticket as sold out while there is still contingent left?
Yes. Switch on Sold out. The other way round, Show Availability shows your guests how many tickets are left.
How do I create an annual pass?
Under Options, switch on Individual validity and enter 365, for example, in Valid for (days). The ticket is then valid for that many days from the purchase. This is also where you limit how often, and how often per day, the ticket may be used.