
Terms and legal texts at checkout
How to add terms, privacy policy and your own documents and decide how buyers confirm them at checkout.
You add your terms, your privacy policy or house rules once as a document. Eventbuddy shows them at checkout and has buyers confirm them, the way you set it up.
Create a document
Open checkout documents
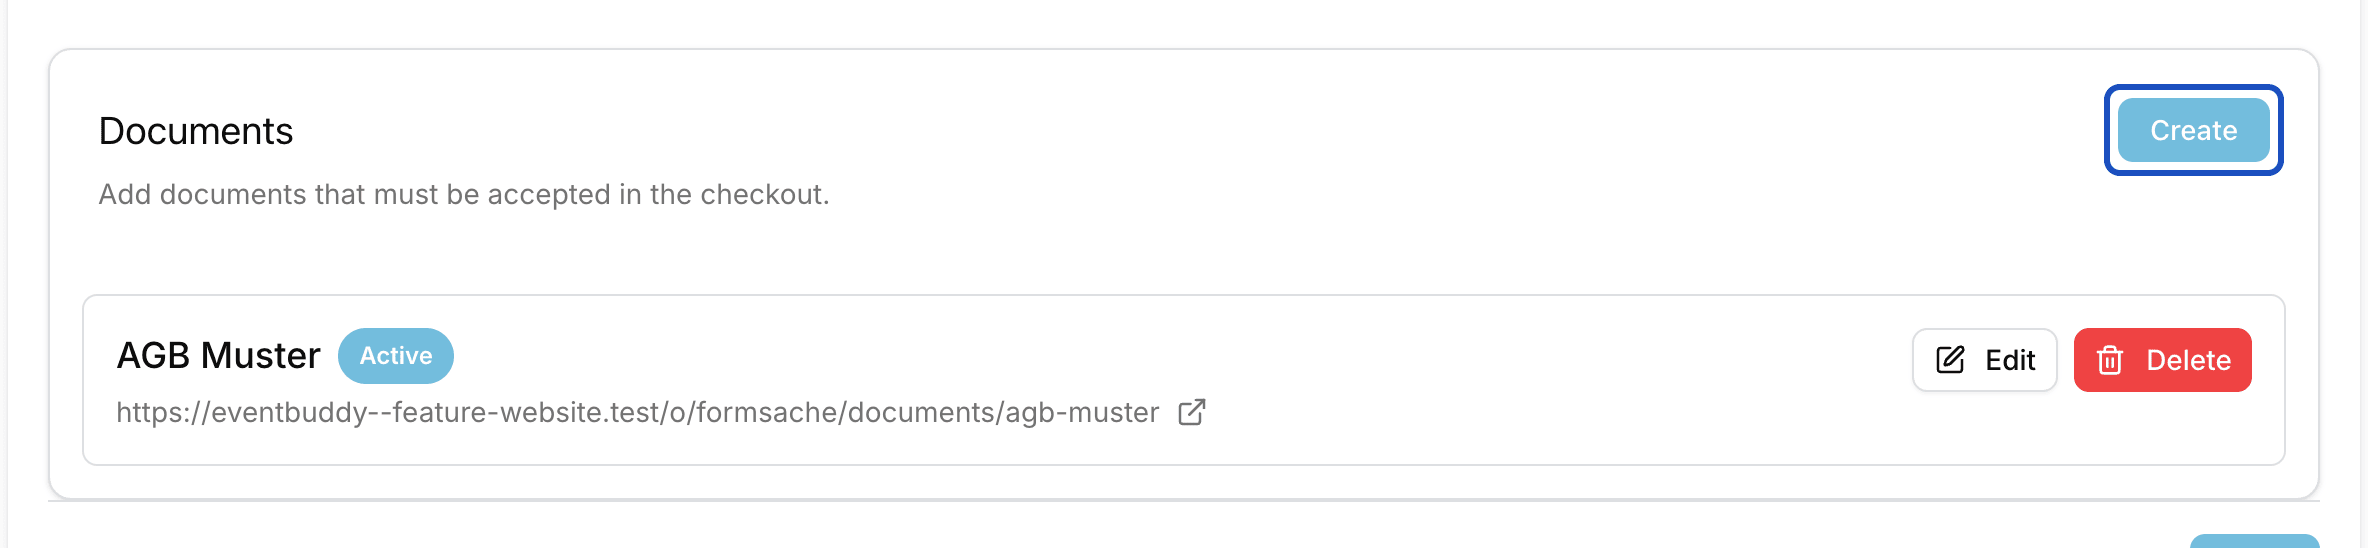
At the bottom of the sidebar, click the name of your organizer, then Settings, and open the Checkout documents tab. If you have no documents yet, the Privacy policy and GTC buttons start a document that is already filled in to match. Otherwise, click Create.
Choose title and type
Enter the Title the way it should appear at checkout. Under Type, choose GTC, Privacy Policy, House rules, Cancellation policy or User-defined for anything else.
Add the content
Under Content type, decide where the text comes from. With Contents, you write or paste it right into the field. With Link, you point to a page on your website. With Upload, you upload a PDF of up to 10 MB.
Set the checkout behavior
Under Checkout behavior, choose how buyers see the document:
- Show only: The document appears as a link at checkout, without a checkbox.
- Grouped checkbox: All documents with this setting share one checkbox: "I accept the following terms of …", with a link to each document.
- Custom checkbox: The document gets its own checkbox. You write the sentence next to it under Checkbox text.
- Hide (Hide at checkout): The document doesn't appear at checkout.
With The checkbox is mandatory., nobody can order without ticking the checkbox.
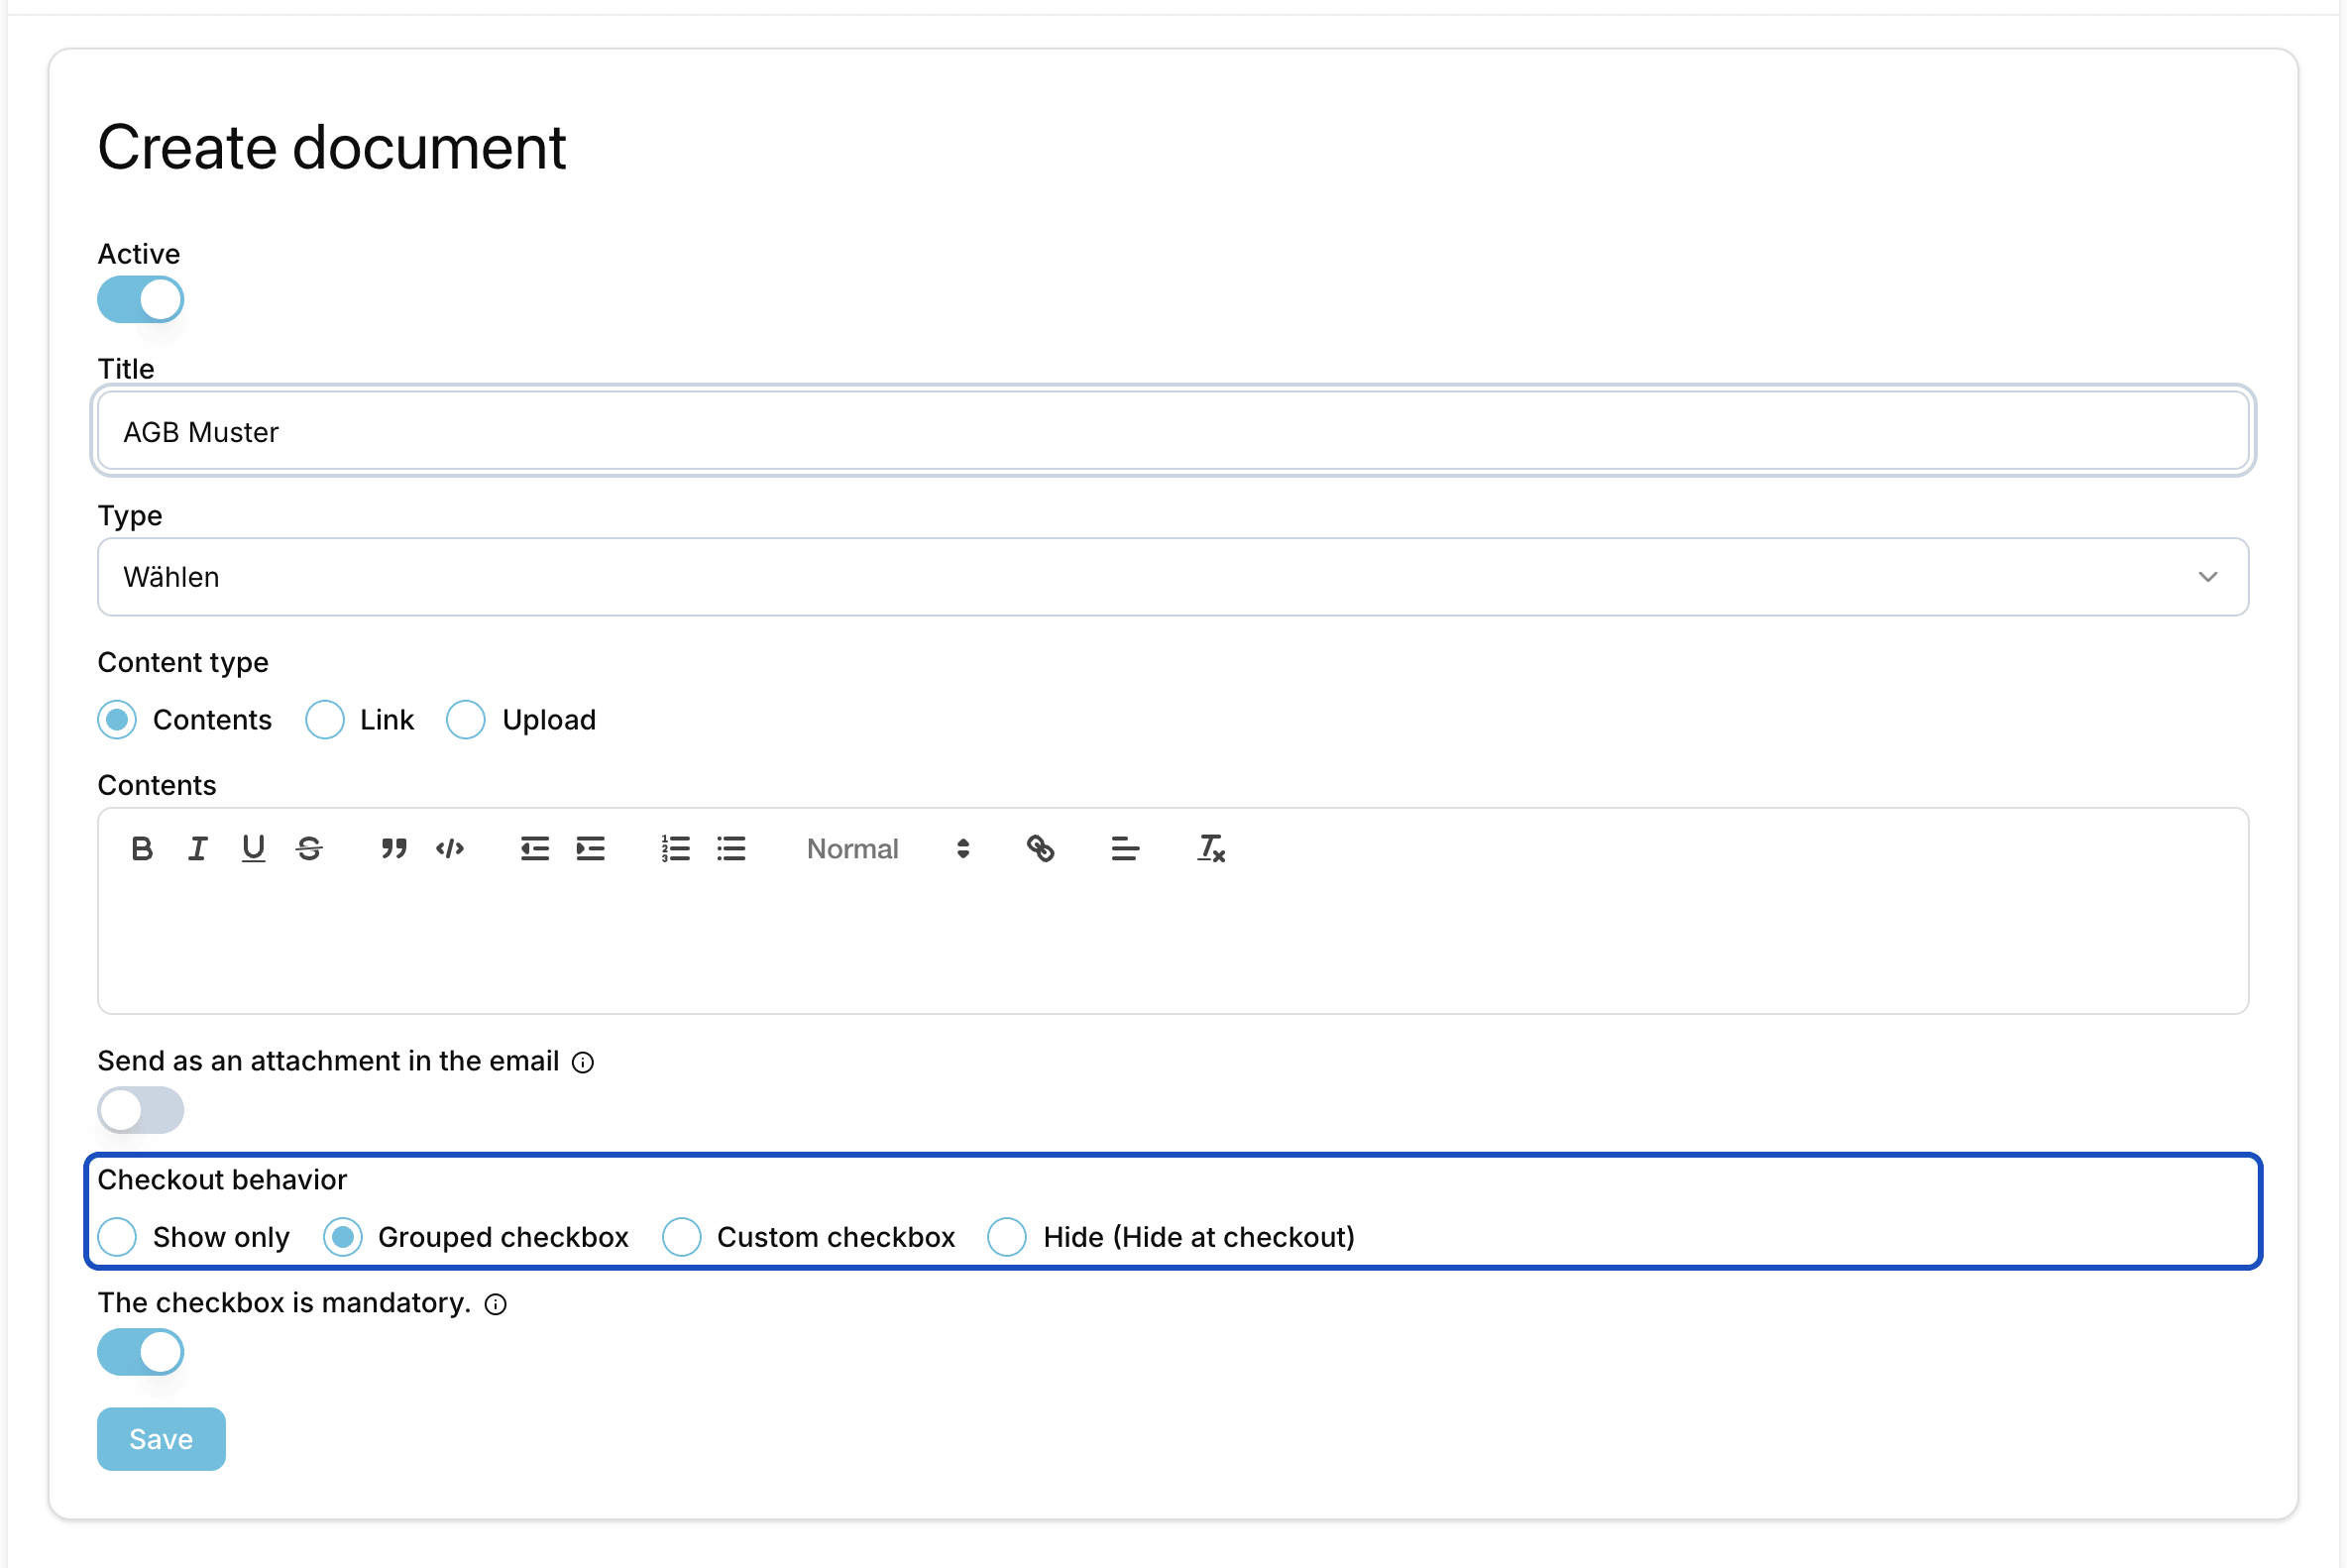
Grouped checkbox is the default. For most legal texts it is enough. Save
Keep Active switched on and click Save. From now on, the document appears at checkout for all your events.
A document for one event only
If house rules or terms of participation only apply to one event, attach them right there. Open the event for editing and, in the Documents section, click Create. The form is the same. The checkout of this event then shows your general documents and the event's documents together.
Good to know
Can I send a document with the order confirmation?
Yes. Switch on Send as an attachment in the email. Eventbuddy creates a PDF from the document and sends it to the buyer with the order confirmation. Combined with Hide, you get a document that only appears in the email.
Why is there a second checkbox at checkout?
Eventbuddy is the ticket service provider for your shop. That's why buyers always also accept the privacy policy and the terms and conditions of Eventbuddy GmbH. This checkbox comes from Eventbuddy and can't be switched off.
How do I take a document out of the checkout without deleting it?
Open it with Edit, switch off Active and save. The list then shows it as Inactive, and it no longer appears at checkout.